- The Herb Guide Home
- Garden Projects
- Old Tyres Water Feature
Old Tyres Water Feature
As an Amazon Associate I earn from qualifying purchases
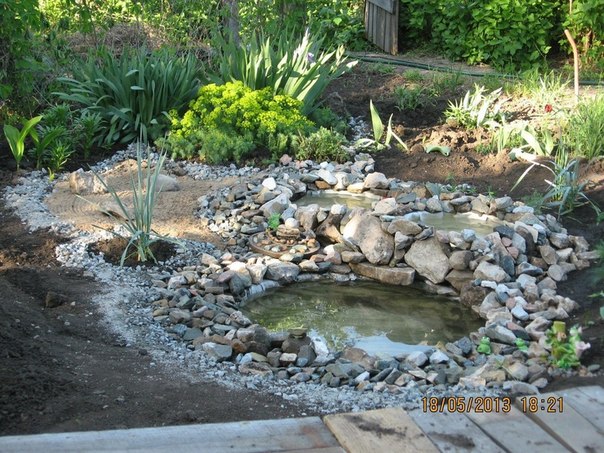
Who'd have thought this old tyres water feature would look so fabulous.
When I first saw the finished pond, I could not believe it was made from anything so mundane as old tyres - a water feature out of old tyres?
Well, check this out and when you see the time and dates on the photos, you will see that it was done in a day. The first photo was taken on 17th May 2013 at 18:47 and the finished project (below) was 18th May 2013 at 18:21.
A great weekend garden project - transform your garden, bury some junk and attract wildlife all in a day.
I found it first on BoredomTherapy.com and they sourced it from a Russian Site dokuchaevsk.com. BoredomTherapy say that their projects are shared on websites, newsletters and social media - I couldn't make head nor tail of the Russian website, although I did try a translator to see if I could find contact details

You can try a sample lesson to help you decide if the Herbal Academy of New England is the right choice for you - follow the link below.
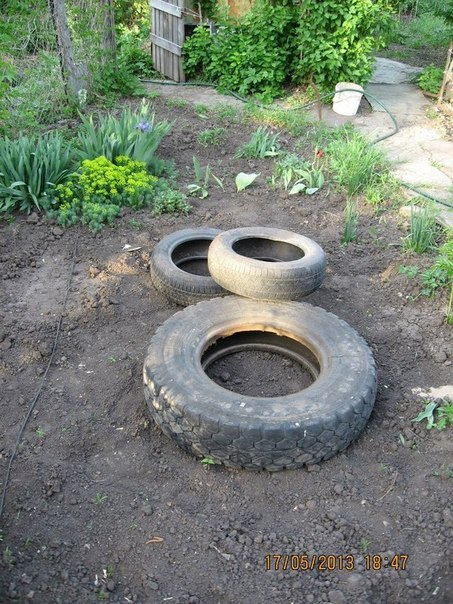
photo by dokuchaevsk.com
Step one is laying out your tyres in the shape.
Clear the ground underneath it - I would imagine that might take you an hour or two depending on how much you've got to clear.
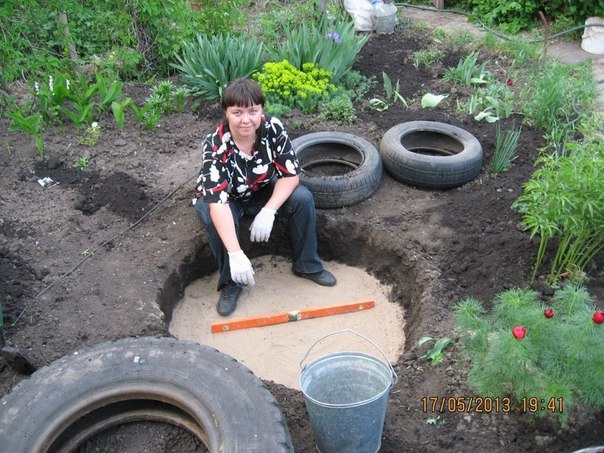
photo by dokuchaevsk.com
Here we have a hole dug out and levelled with sand for the base. It appears to be as deep as the tyre, although I think that's up to you if you want it above or below ground.
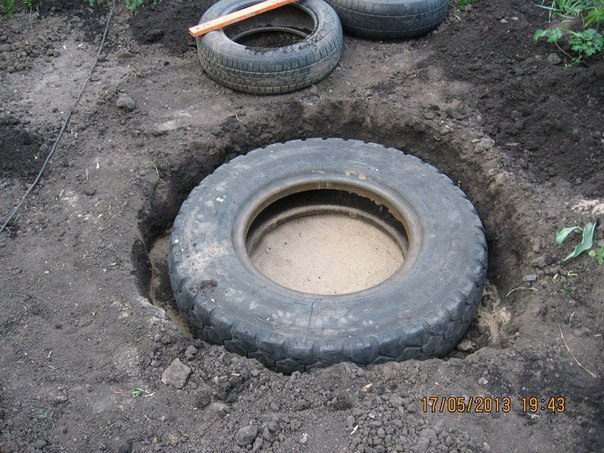
photo by dokuchaevsk.com
So - the tyre is put into the hole and there's some space around it and it's set below the level of the surrounding soil.
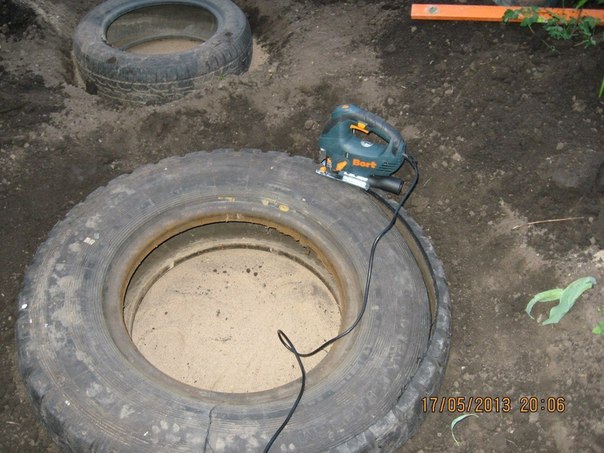
photo by dokuchaevsk.com
Here they are using an electric saw to remove the top wall of the tyre. I suppose you could use a hacksaw, but I expect it will take you longer and you will have very sore hands if you decide to do a three tyre water feature, like this one here ;-)
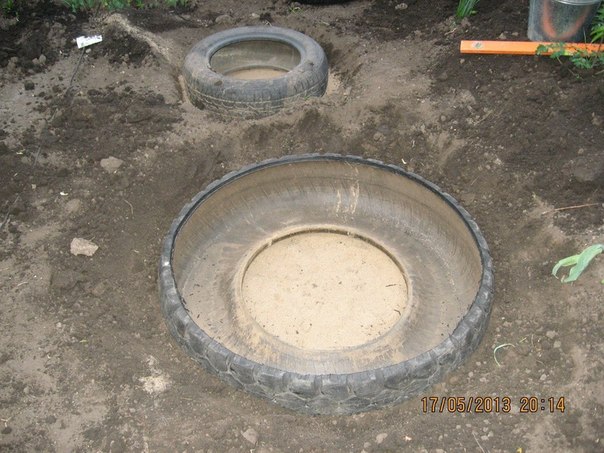
photo by dokuchaevsk.com
Here's the tyre with the top cut off - you can see another one is set slightly higher and behind it.
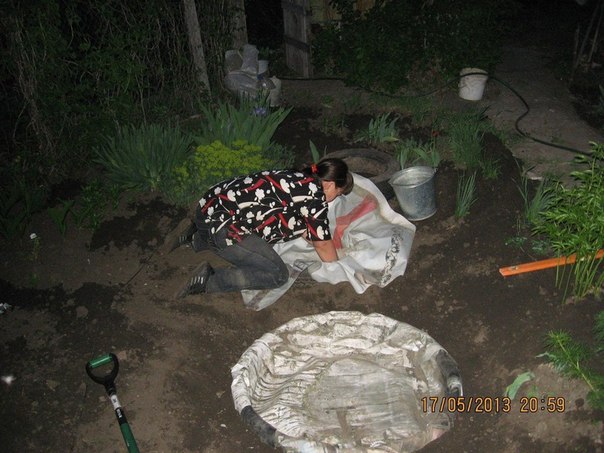
photo by dokuchaevsk.com
Here we are - nearly 21:00 and the tyres are being lined with - well, I can't quite make it out, but you could use heavy duty polythene, proper pond liner or anything fairly thick and waterproof - you will have to measure the area you need, but I would imagine you could use offcuts and do this fairly cheaply.
To measure, take the width of the tyre, add twice the depth and add another 24 inches or so for an overlap - I would say better be safe than sorry, you can always trim off after you've filled the ponds with water.
Old Tyres Water Feature - day two
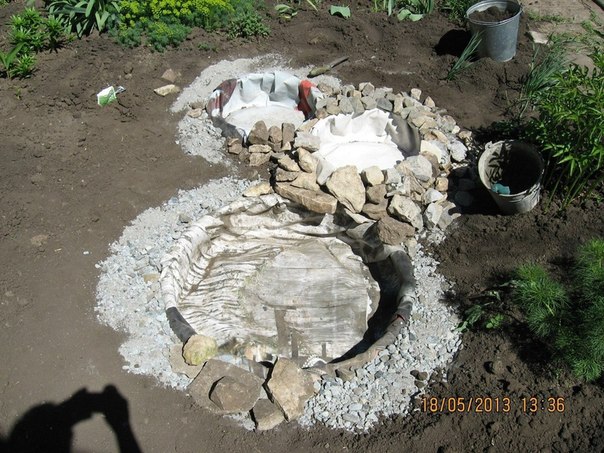
photo by dokuchaevsk.com
Here we have the next afternoon and all three tyres have been lined. Rocks and gravel are built up around the edges so that it blends into the landscape. This is pretty exciting eh?
At this point, before you start putting too many rocks around the edge, fill the tyres with water - this will settle the liner into the pond and you will then see how much spare you have - you need to trim it away, but only once you know you've got enough to reach the bottom and fill in all the sides. ONLY THEN trim and put the rocks around the edge.
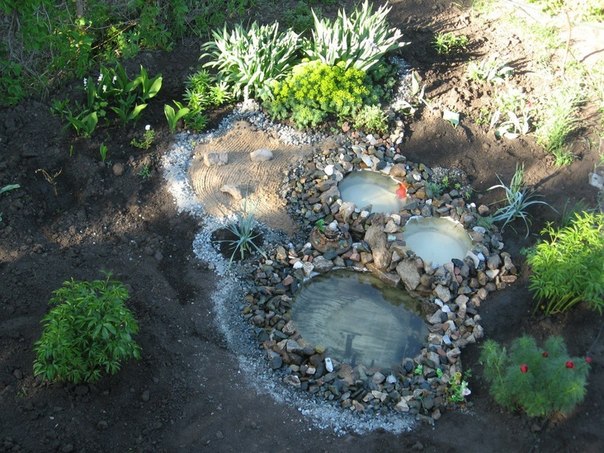
photo by dokuchaevsk.com
Oh WOW!!! Here it is, the final finished old tyres water feature - looks like the photo has been taken from an upstairs window into the garden.
It's beautifully finished off with rocks, pebbles, gravel, plants and even a bit of a Zen Garden in the sand - I think it looks fabulous!
Let me know if you decided to have a go at this - it's certainly a project you could plan for spring or even do it now, so that the water has time to settle and you could maybe add some water plants next season.
I may receive a commission if you purchase something mentioned in this post. See more details here This will not affect the amount you pay.

