- The Herb Guide Home
- Growers Dictionary
- Propagation By Cuttings
Propagation by Cuttings
As an Amazon Associate I earn from qualifying purchases
Propagation by Cuttings
Whatever plant you want to increase by taking cuttings is divided into 5 easy steps.
1 Prepare your pots or tray.
2 Take your plant cuttings.
3 Put them in your pots or tray.
4 Select the right place to leave them to root.
5 Pot on.
All plants need the same treatment for propagation in steps 1 to 3 - steps 4 and 5 are where you need to separate the plants into tender and hardy.


You can try a sample lesson to help you decide if the Herbal Academy of New England is the right choice for you - follow the link below.
It is easy and cheap to grow plants from cuttings - a very efficient way of increasing your stock if you are interested in growing herbs for profit - or indeed growing plants for profit in general - link at the bottom for growing herbs for profit.
Between July and September (northern hemisphere) hormones change and those that stimulate rooting are increased.
You need a sharp knife and some soil. Some people like to use a hormone rooting solution or powder - I generally do just to be sure.
You can use a greenhouse, cold frame, propagator or your windowsill.
Methods differ for propagation by cuttings only slightly depending on the hardiness and where you're going to grow on.
As a word of caution, remember that the 9 trays of 100 rooted cuttings will need potting on at some point - do you have space for nine hundred small plant pots? If not, think again about the quantities you're going to grow of each variety.
As an aside here, you can mix cuttings in the same tray as long as they are all of a similar hardiness and you are able to identify them either by labelling carefully or because you can reliably recognise the species by leaf.
Propagation by cuttings - step by step
Step 1 Prepare your pots or trays.
Take 3 inch pots or larger trays and fill to within about half an inch of the top with potting compost and water well. Allow to drain so that the dirt/soil is not waterlogged - about 30 minutes should do.
Step 2 Take your plant cuttings.
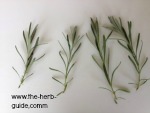
With a sharp knife cut a healthy non-flowering shoot about 3 inches long.
Strip the bottom third of leaves and make sure you cut again where the lowest leaf was - you can see that by the scar left – this is where the hormone is concentrated most strongly. Also, the section below the leaf may die off and that could spoil your cutting by rotting in the soil and introducing fungus.
Step 3 Put your cuttings in the pots or trays.
It is at this point that you would dip your cuttings in rooting hormone powder or solution if you wish to do so.
Place up to 5 cuttings in a 3 inch pot - if you're using trays, then leave about 1 to 2 inches between the cuttings.
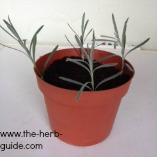
Make a hole in the compost with a dibber or the end of a pencil. Put the cutting gently into the hole made and firm the soil around it with the dibber. Once all the cuttings are in the pot, give it a gentle tap to level the soil and firm round with your fingers gently.
Step 4 Leave them to root.
Now - if it's a tender species then you need to keep these indoors.
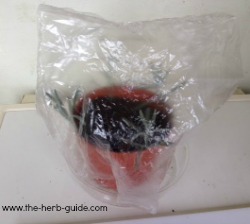
Either put a plastic bag secured with an elastic band over to maintain the humidity or use a covered propagator - you could use one with bottom heat which will help cuttings root better. Be careful not to let the plastic touch the leaves - use a few CLEAN sticks to hold the polythene away.

If you keep them indoors, they they will need hardening off prior to going outside in the Spring. This is quite simply, putting the plants outside during daylight hours to acclimatize them to the outdoors. Plant them outside after about four weeks or when the risk of frost has passed.
This could be the start of your plant or herb nursery – less than a year to establish stock to sell and you still have the stock plant, which will have very obligingly put on some growth for you take more cuttings again this year! Isn't Mother Nature wonderful?
If you have to transport cuttings, then take some plastic bags and pieces of paper with you. Take the trimmings from the plant and write on the paper what the cutting is – then as soon as possible, deal with the cuttings as above.
You should be OK for a couple of hours but take larger pieces so that you can trim down further – probably 5 inches or so of plant to trim back down to 3 inches when you’re able to deal with the cuttings.
Step 5 Pot on.
When your plants have rooted - you'll be able to tell that when you see new growth - then for your tender species, remove the cover and allow to establish for a few days.
Use a 3 inch pot filled with potting compost as before. Put each rooted cutting into the compost using a dibber to make a hole big enough to hold the roots. Firm the soil and treat with tender loving care over the winter.
When dealing with your outdoor cuttings, they should be left alone until the spring when a large proportion should have rooted - resist the tempatation to tug. You will see growth when they are growing or they will die in which case, you know you have failed in that particular batch of cuttings.
These pages will also be of interest to you
I may receive a commission if you purchase something mentioned in this post. See more details here This will not affect the amount you pay.


